For tattoo artists who view tattoos not just as ink on the skin but as a statement woven into the fabric of individuality, understanding tattoo stencil creation and placement is not unlike comprehending the foundational strokes of a painting. In this comprehensive guide, we will discuss the intricate process of crafting stencils - the first important step in creating a masterful tattoo.
The Crucial Art of Tattoo Stencil Prep
Before you start inking your ideas, creating a stencil with precision is paramount. Shaky outlines and wobbly lines can mar the final masterpiece. Here's how to ensure your stencil game is tight.
How to Use Tattoo Stencil Paper
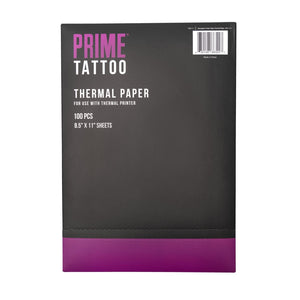
The type of stencil paper you use can influence the outcome. There are two main types: thermal and hectograph. Thermal stencil paper requires a thermal copier (or imager), whereas a hectograph can be used manually but may need a reapplication of a stencil solution for larger, more complex designs.
In this article, we will focus on thermal stencils that require thermal paper and a thermal imager.
Thermal Stencil Paper
Whether you have designed your masterpiece on a tablet or have hand-drawn your design, you then need to get it onto the thermal paper. From a tablet, you can easily print your design on to paper. Simply slide your artwork into the thermal stencil paper and into the sleeve, and then into the thermal copier. Then you are ready to print your desired design. The thermal paper relies on heat to transfer the image (or design) to the stencil page of the paper. You can then place your stencil onto the desired location of the tattoo on the body.
Some of our favorite tools for this process include:
To apply your design:
- Clean and dry the skin area where the stencil is to be applied.
- Use a stencil solution to saturate the skin area.
- Place the stencil on the desired area, hold it in place until it’s tacky, then peel it away.
- Your stencil should remain on the skin for 5 to 10 minutes before getting to work.
- Now you’re ready to begin the tattoo
How to Make a Tattoo Stencil
Creating a stencil is more than just transferring an image—it’s about replication with precision.
Choosing the Right Image
Opt for simpler images, especially if you’re just starting. Bold lines and clear edges will result in a better stencil.
Transferring the Image
A quality transfer ensures your design is faithful and ready for placement.
Cutting the Stencil
Cut on the lines, and don't forget to puncture any areas that will be shaded in or filled with color. This "break" in the stencil will ensure that your shading and coloring end up in the right place.
How to Place a Tattoo Stencil
The placement of your stencil sets the stage for the ink to come. It should be precise but also allow for comfortable working conditions.
The Tactical Approach to Stencil Placement
The right placement will not only be where your client wants the tattoo but also where you can work without contorting your hand or body.
Client Consultation
Always consult with the client before placement. Ensure the client is happy with the position and has had the opportunity to inspect how the tattoo will look anatomically.
Your Comfort Counts
Remember, you’ll be working with this design for an extended period; make sure you're comfortable with the placement for the best ergonomic control.
Light and Shadow Play
Ensure your placement doesn't create shadows that could obscure your work. Good overhead lighting is your friend when positioning a stencil correctly.
How to Apply a Tattoo Stencil to Skin
Craftsmanship doesn't end with the stencil creation; it extends to the transfer onto skin, one of the most delicate operations in the tattoo world. The more intricate the tattoo design, the more important the execution of your stencil.
The Subtle Art of Adhesion
Your stencil needs to stick yet be easily removed. It should also not smudge when you lay it down.
Using Stencil Transfer Gels or Liquids
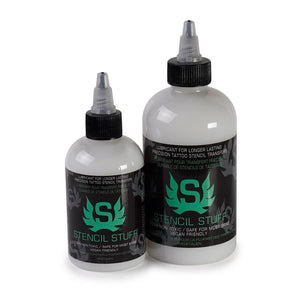
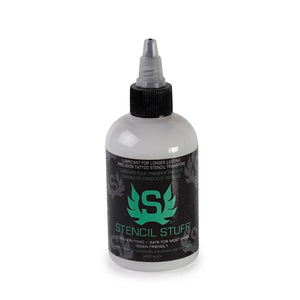
The best way to ensure your stencil transfers, stays, and doesn’t budge is to use a solution under the stencil. Artists use solutions like Stencil Stuff to ensure their creations stay put on transfer.
Application Technique
Apply the transfer product sparingly. Too much product will result in a sticky mess or smudging.
How to Get A Tattoo Stencil Off of Skin
A tattoo stencil that's hard to remove is as much a problem as one that disappears before you're ready. Here’s how to manage it.
When the Stencil Doesn’t Stick
Multiple factors can prevent a stencil from sticking. The area might not have been cleaned, or you might have applied too much transfer product. Make sure the skin is dry and the stencil solution is the only liquid your stencil encounters.
Overcoming the Sticky Situation
Sometimes, a stencil will stick too well. In this situation, remove it with a steady hand and use a small amount of isopropyl alcohol to get any stubborn residue off.
End with a Clean Slate
Before you begin tattooing, ensure the skin is a clean canvas. Any leftover stencil might interfere with your inking, leading to smudges or excess ink uptake.
Advanced Considerations and Final Words
Mastering the art of tattoo stencil use is a progression. With each tattoo, you’ll learn and refine your process. Pay special attention to feedback from mentors and clients. Remember, a well-placed and well-inked tattoo begins with a stellar stencil.
Armed with these insightful tips, your path to becoming—or upping your game as—a tattoo artist is paved with clarity and skill. Precision, preparation, and practice will make your stencils—and, consequently, your tattoos—visionary works that trod the line between body and art.


